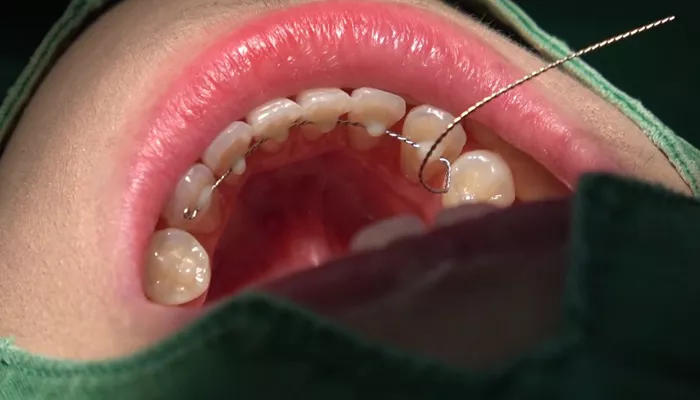
Orthodontic treatment is essential for correcting misaligned teeth and jaws. One of the most critical steps in orthodontic treatment is the placement of brackets. Brackets serve as anchors for the archwire, which helps move the teeth into their desired positions. Proper placement of orthodontic brackets is crucial for the effectiveness of the treatment and the comfort of the patient. In this article, we will provide a detailed guide on how to place orthodontic brackets, including the necessary materials, steps, and tips for success.
What Is Orthodontic Brackets?
Orthodontic brackets are small devices that are bonded to the teeth. They are typically made of metal, ceramic, or plastic. Brackets come in various shapes and sizes, depending on the type of orthodontic treatment being performed. The primary function of brackets is to hold the archwire in place, which applies gentle pressure to the teeth, guiding them into alignment over time.
Brackets can be classified into two main categories:
Metal Brackets: These are the most common type of brackets. They are durable, effective, and often less expensive than other options.
Ceramic Brackets: These brackets are less visible than metal brackets, making them a popular choice for adults and teens who are concerned about aesthetics. However, they may be more fragile and can stain over time.
see also: Which Type of Wax Is Used to Cover Orthodontic Brackets
Materials Needed for Bracket Placement
Before beginning the bracket placement procedure, it is essential to gather all necessary materials. Here is a list of items you will need:
Orthodontic brackets (metal or ceramic)
Bonding adhesive (light-cure or chemical-cure)
Etching gel (typically phosphoric acid)
Saline solution or water (for rinsing)
Microbrushes (for applying etching gel and adhesive)
Brackets placement instrument (for positioning brackets)
Archwire (for initial placement)
Ligatures (if using traditional brackets)
Curing light (for light-cure adhesives)
Cotton rolls or gauze (to keep the area dry)
Dental suction device (to maintain a clear field)
Gloves and masks (for infection control)
Step-by-Step Guide to Placing Orthodontic Brackets
Step 1: Prepare the Patient
Before starting the procedure, ensure that the patient is comfortable and informed about the process. Explain the steps involved and address any concerns they may have.
Position the Patient: Seat the patient in a dental chair with their head supported and positioned for easy access to the mouth.
Use Protective Barriers: Place a bib on the patient to protect their clothing from debris and materials used during the procedure.
Step 2: Clean and Isolate the Teeth
Proper cleaning and isolation of the teeth are crucial for successful bonding.
Clean the Teeth: Use a toothbrush or prophy cup with a non-fluoride paste to clean the surfaces of the teeth where the brackets will be placed. Rinse the mouth thoroughly with water or saline solution.
Isolate the Teeth: Use cotton rolls or a dental suction device to keep the area dry. This helps prevent saliva from interfering with the bonding process.
Step 3: Etch the Tooth Surface
Etching prepares the enamel for bonding by creating a rough surface.
Apply Etching Gel: Using a microbrush, apply phosphoric acid etching gel to the surface of the teeth where the brackets will be placed.
Ensure that the gel covers the entire area.
Wait for the Recommended Time: Allow the etching gel to sit for the manufacturer’s recommended time, usually around 15 to 30 seconds.
Rinse and Dry: Rinse the etching gel off thoroughly with water and dry the tooth surface using air or gauze. The enamel should appear frosty after etching.
Step 4: Apply Bonding Adhesive
The bonding adhesive is what will hold the brackets in place.
Apply Bonding Adhesive: Using a microbrush, apply a thin layer of bonding adhesive to the etched surface of the tooth.
Ensure even coverage.
Position the Bracket: Take the orthodontic bracket and place it on the adhesive-covered area. Use a bracket placement instrument to ensure proper positioning.
Press and Hold: Gently press the bracket against the tooth for a few seconds to ensure good contact with the adhesive.
Step 5: Cure the Adhesive
Curing the adhesive is essential for securing the brackets to the teeth.
Use a Curing Light: If using a light-cure adhesive, position the curing light over the bracket. Follow the manufacturer’s instructions for the appropriate curing time, usually around 10 to 20 seconds.
Check for Proper Bonding: After curing, gently tug on the bracket to ensure it is securely bonded to the tooth. If it feels loose, reapply adhesive and cure again.
Step 6: Place the Archwire
Once all brackets are in place, the archwire can be inserted.
Select the Appropriate Archwire: Choose an archwire that is suitable for the initial phase of treatment.
Insert the Archwire: Carefully place the archwire into the slots of each bracket. Ensure that it is seated properly.
Secure the Archwire: If using traditional brackets, place ligatures around each bracket to hold the archwire in place. Use a ligature tying instrument for this step.
Step 7: Final Checks and Instructions
Before concluding the appointment, perform final checks and provide the patient with post-treatment instructions.
Check Bracket Placement: Inspect each bracket to ensure they are correctly positioned and bonded. Make any necessary adjustments.
Provide Post-Treatment Instructions: Explain to the patient how to care for their braces, including proper oral hygiene techniques and dietary restrictions. Discuss the importance of attending regular follow-up appointments.
Schedule Follow-Up Appointments: Schedule the next appointment for adjustments and monitoring of the treatment progress.
Conclusion
Placing orthodontic brackets is a critical step in orthodontic treatment that requires careful attention to detail and technique. By following the outlined steps and tips, dental professionals can ensure successful bracket placement, leading to effective treatment outcomes for patients. Proper placement not only enhances the effectiveness of orthodontic appliances but also contributes to patient comfort and satisfaction. With the right approach and materials, orthodontic treatment can significantly improve a patient’s smile and overall oral health.

