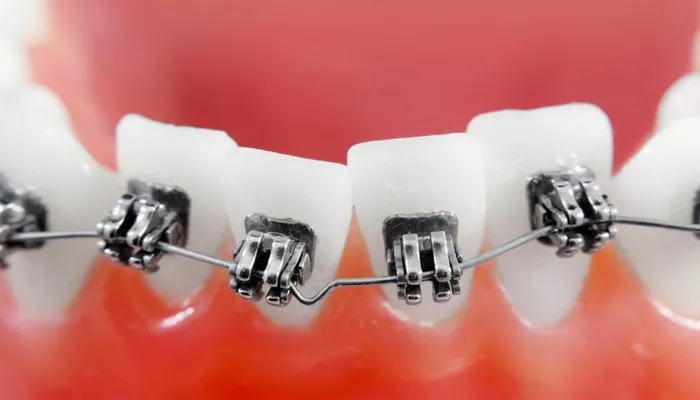
Orthodontic treatment is essential for correcting misaligned teeth and jaws. One of the key components of this treatment is the use of orthodontic wires, which are attached to brackets on the teeth. These wires apply pressure to the teeth, helping them move into their desired positions. At some point during treatment, it may be necessary to remove these wires, whether for adjustments, repairs, or to transition to a different stage of treatment. This article provides a detailed guide on how to safely and effectively remove orthodontic wires.
What Is Orthodontic Wires?
Orthodontic wires are thin metal or composite materials that connect brackets on the teeth. They come in various types, including stainless steel, nickel-titanium, and beta-titanium. Each type of wire has unique properties that affect its flexibility, strength, and ability to apply force to the teeth.
Removing orthodontic wires is a routine procedure in orthodontics. However, it requires precision and care to avoid damaging the brackets or the teeth. Proper technique is essential for ensuring a smooth transition between different stages of treatment.
Step-by-Step Guide to Removing Orthodontic Wires
Step 1: Prepare the Patient
Before starting the procedure, ensure that the patient is comfortable and informed about the process.
Position the Patient: Seat the patient in a dental chair with their head supported and positioned for easy access to the mouth.
Use Protective Barriers: Place a bib on the patient to protect their clothing from debris and materials used during the procedure.
Explain the Procedure: Briefly explain the wire removal process to the patient. Address any concerns they may have.
SEE ALSO: How Often Should You Change Your Orthodontic Elastics?
Step 2: Isolate the Area
Proper isolation of the teeth is crucial for effective wire removal.
Use Cotton Rolls: Place cotton rolls or gauze in the patient’s mouth to keep the area dry. This helps prevent saliva from interfering with the procedure.
Use Dental Suction: Utilize a dental suction device to maintain a clear field and remove any excess saliva or debris.
Step 3: Inspect the Orthodontic Wires and Brackets
Before removing the wires, it is essential to inspect them for any issues.
Check for Damage: Use a dental explorer to check the wires and brackets for any signs of damage or wear. If a wire is broken or a bracket is loose, take note of it for further action.
Assess the Wire Tension: Determine if the wire is under tension. If it is, carefully assess how to release the tension before removal.
Step 4: Remove Ligatures (if applicable)
If the orthodontic wires are secured with ligatures, these must be removed first.
Use Ligature Cutters: Use a pair of ligature cutters to carefully cut the ligatures that hold the wire in place. Be cautious not to damage the brackets or the wire.
Remove Ligatures: Once cut, gently remove the ligatures from the brackets. Dispose of them properly.
Step 5: Cut the Orthodontic Wire
With the ligatures removed, you can now cut the wire.
Identify the Cutting Point: Determine where to cut the wire. It is usually best to cut the wire at the distal end of the last bracket.
Use Wire Cutters: Take the orthodontic wire cutting pliers and position them at the identified cutting point. Apply gentle pressure to cut the wire cleanly.
Remove the Cut Wire: After cutting, carefully remove the wire from the brackets. Start from one end and gently pull it out, ensuring not to damage the brackets or adjacent teeth.
Step 6: Check Brackets and Teeth
After removing the wire, inspect the brackets and teeth for any issues.
Examine Brackets: Check each bracket to ensure it is still securely bonded to the tooth. If any brackets are loose or damaged, note them for repair.
Inspect Teeth: Look for any signs of irritation or damage to the teeth or gums caused by the wire. If any issues are identified, address them appropriately.
Step 7: Clean the Area
Once the wire is removed, it is essential to clean the area.
Rinse with Saline Solution: Use a saline solution or water to rinse the area. This helps remove any debris or particles left from the wire removal process.
Dry the Area: Use gauze or cotton rolls to dry the area thoroughly. This ensures a clear view for any further procedures.
Step 8: Prepare for Next Steps
After removing the wire, you may need to prepare for the next stage of treatment.
Discuss Next Steps with the Patient: Inform the patient about what to expect next. This may include placing a new wire, adjusting brackets, or scheduling a follow-up appointment.
Place New Wire (if applicable): If a new wire is to be placed immediately, follow the appropriate steps for inserting the new wire and securing it with ligatures.
Conclusion
Removing orthodontic wires is a routine but essential procedure in orthodontic treatment. By following the outlined steps and tips, dental professionals can ensure safe and effective wire removal, leading to a smooth transition between different stages of treatment. Proper wire removal not only enhances the effectiveness of orthodontic appliances but also contributes to patient comfort and satisfaction.

